One of the things that we are working on at UNT is a redesign of The Portal to Texas History’s interface. In doing so I’ve been looking around quite a bit at other digital libraries to get ideas of features that we could incorporate into our new user experience.
One feature that I found that looked pretty nifty was the “peek” interface for the Carolina Digital Repository. They make the code for this interface available to others to use if they are interested via the UNC Libraries GitHub in the peek repository. I think this is an interesting interface but I had the question still of “how did you decide which images to choose”. I came across the peek-data repository that suggested that the choosing of images was a manual process, and I also found a powerpoint presentation titled “A Peek Inside the Carolina Digital Repository” by Michael Daines that confirmed this is the case. These slides are a few years old so I don’t know if the process is still manual.
I really like this idea and would love to try and implement something similar for some of our collections but the thought of manually choosing images doesn’t sound like fun at all. I looked around a bit to see if I could borrow from some prior work that others have done. I know that the Internet Archive and the British Library have released some large image datasets that appear to be the “interesting” images from books in their collections.
Less and More interesting images
I ran across a blog post by Chris Adams who works on the World Digital Library at the Library of Congress called “Extracting images from scanned book pages” that seemed to be close to what I wanted to do, but wasn’t exactly it either.
I remembered back to a Code4Lib Lightning Talk a few years back from Eric Larson called “Finding image in book page images” and the companion GitHub repository picturepages that contains the code that he used. In reviewing the slides and looking at the code I think I found what I was looking for, at least a starting point.
Process
What Eric proposed for finding interesting images was that you would take an image, convert it to grayscale, increase the contrast dramatically, convert this new images into a single pixel wide image that is 1500 pixels tall and sharpen the image. That resulting image would be inverted, have a threshold applied to it to convert everything to black or white pixels and then it would be inverted again. Finally the resulting values of either black or white pixels are analyzed to see if there are areas of the image that are 200 or more pixels long that are solid black.
convert #{file} -colorspace Gray -contrast -contrast -contrast -contrast -contrast -contrast -contrast -contrast -resize 1X1500! -sharpen 0x5 miff:- | convert - -negate -threshold 0 -negate TXT:#{filename}.txt`
The script above which uses ImageMagick to convert an input image to greyscale, calls contrast eight times, resizes the image and the sharpens the result. It pipes this file into convert again, flips the colors, applies and threshold and flips back the colors. The output is saved as a text file instead of an image, with one line per pixel. The output looks like this.
# ImageMagick pixel enumeration: 1,1500,255,srgb
...
0,228: (255,255,255)  #FFFFFF  white
0,229: (255,255,255)  #FFFFFF  white
0,230: (255,255,255)  #FFFFFF  white
0,231: (255,255,255)  #FFFFFF  white
0,232: (0,0,0)  #000000  black
0,233: (0,0,0)  #000000  black
0,234: (0,0,0)  #000000  black
0,235: (255,255,255)  #FFFFFF  white
0,236: (255,255,255)  #FFFFFF  white
0,237: (0,0,0)  #000000  black
0,238: (0,0,0)  #000000  black
0,239: (0,0,0)  #000000  black
0,240: (0,0,0)  #000000  black
0,241: (0,0,0)  #000000  black
...
The next step was to loop through each of the lines in the file to see if there was a sequence of 200 black pixels.
I pulled a set of images from an ETD that we have in the UNT Digital Library and tried a Python port of Eric’s code that I hacked together. For me things worked pretty well, it was able to identify the images that I would have manually pulled as pages that were “interesting” on my own.
But there was a problem that I ran into, the process was pretty slow.
I pulled a few more sets of page images from ETDs and found that for those images it would take the ImageMagick convert process up to 23 seconds per images to create the text files that I needed to work with. This made me ask if I could actually implement this same sort of processing workflow with just Python.
I need a Pillow
I have worked with the Python Image Library (PIL) a few times over the years and had a feeling it could do what I was interested in doing. I ended up using Pillow which is a “friendly fork” of the original PIL library. My thought was to apply the same processing workflow as was carried out in Eric’s script and see if doing it all in python would be reasonable.
I ended up with an image processing workflow that looks like this:
# Open image file
im = Image.open(filename)

# Convert image to grayscale image
g_im = ImageOps.grayscale(im)

# Create enhanced version of image using aggressive Contrast
e_im = ImageEnhance.Contrast(g_im).enhance(100)

# resize image into a tiny 1x1500 pixel image
# ANTIALIAS, BILINEAR, and BICUBIC work, NEAREST doesn't
t_im = e_im.resize((1, 1500), resample=Image.BICUBIC)

# Sharpen skinny image file
st_im = t_im.filter(ImageFilter.SHARPEN)

# Invert the colors
it_im = ImageOps.invert(st_im)

# If a pixel isn't black (0), make it white (255)
fixed_it_im = it_im.point(lambda x: 0 if x < 1 else 255, 'L')

# Invert the colors again
final = ImageOps.invert(fixed_it_im)

final.show()
I was then able to iterate through the pixels in the final image with the getdata() method and apply the same logic of identifying images that have sequences of black pixels that were over 200 pixels long.
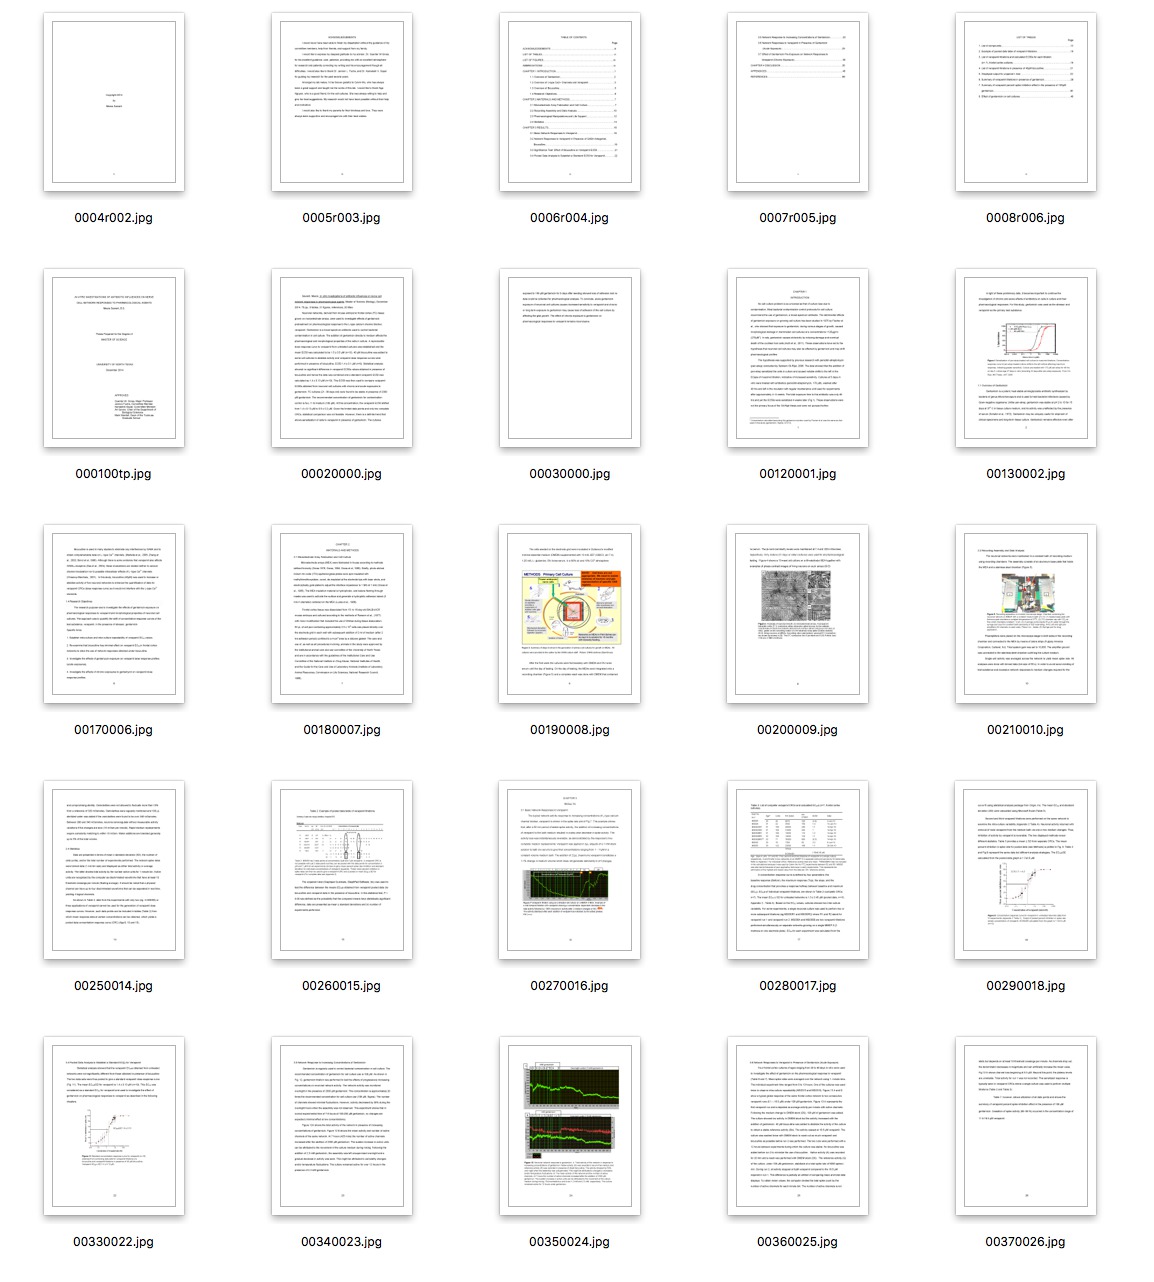
Here are some examples of thumbnails from three ETDs, first all images and then just the images identified by the above algorithm as “interesting”.
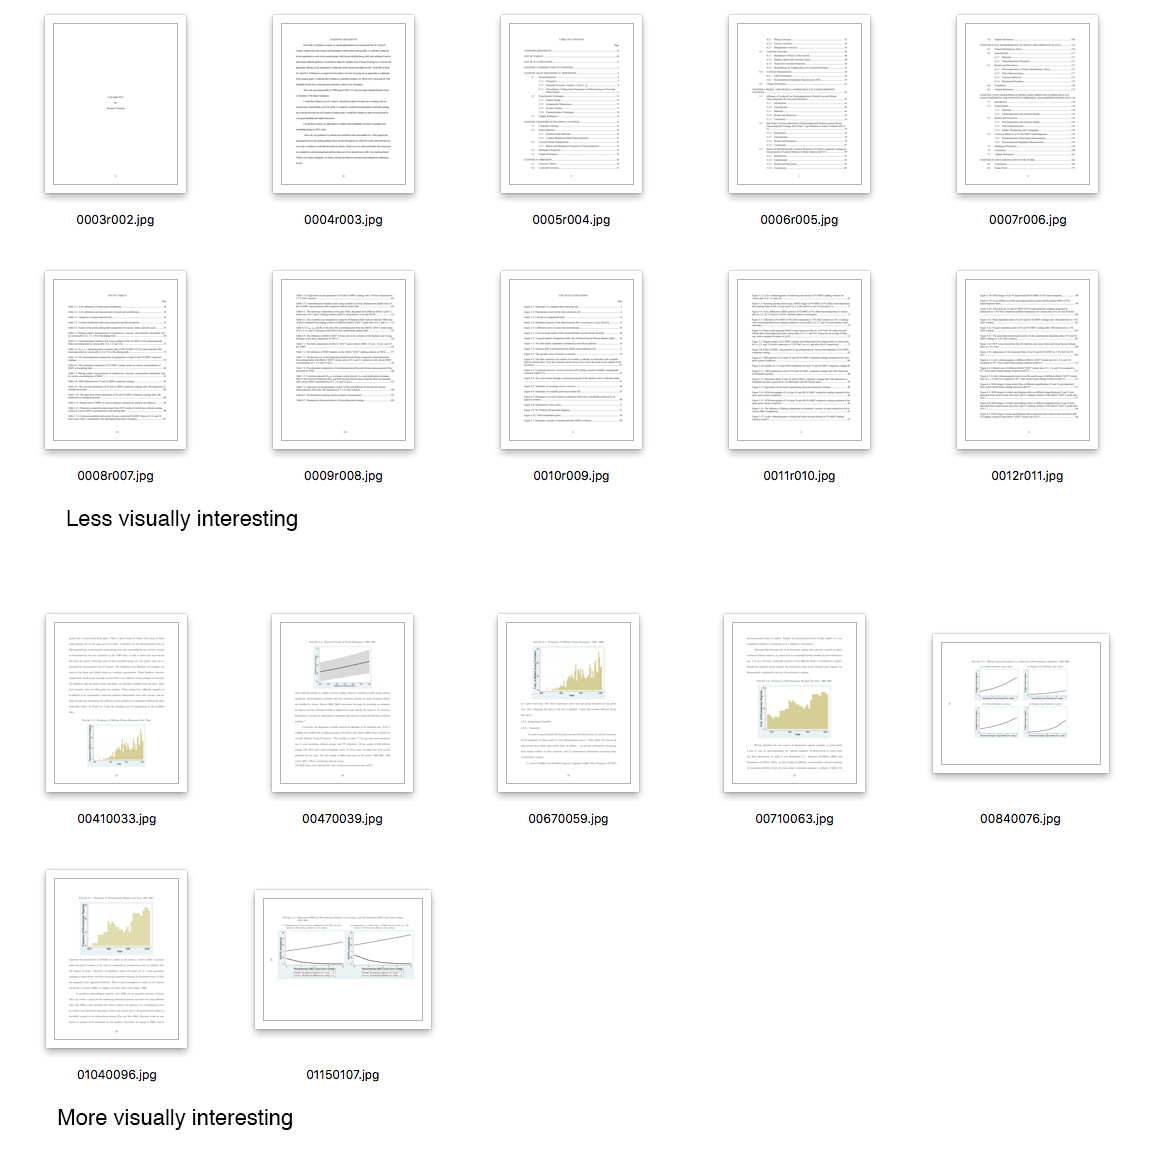
Example One
Thumbnails for ark:/67531/metadc699990/ including interesting and less visually interesting pages.
Thumbnails for ark:/67531/metadc699999/ with just visually interesting pages shown.
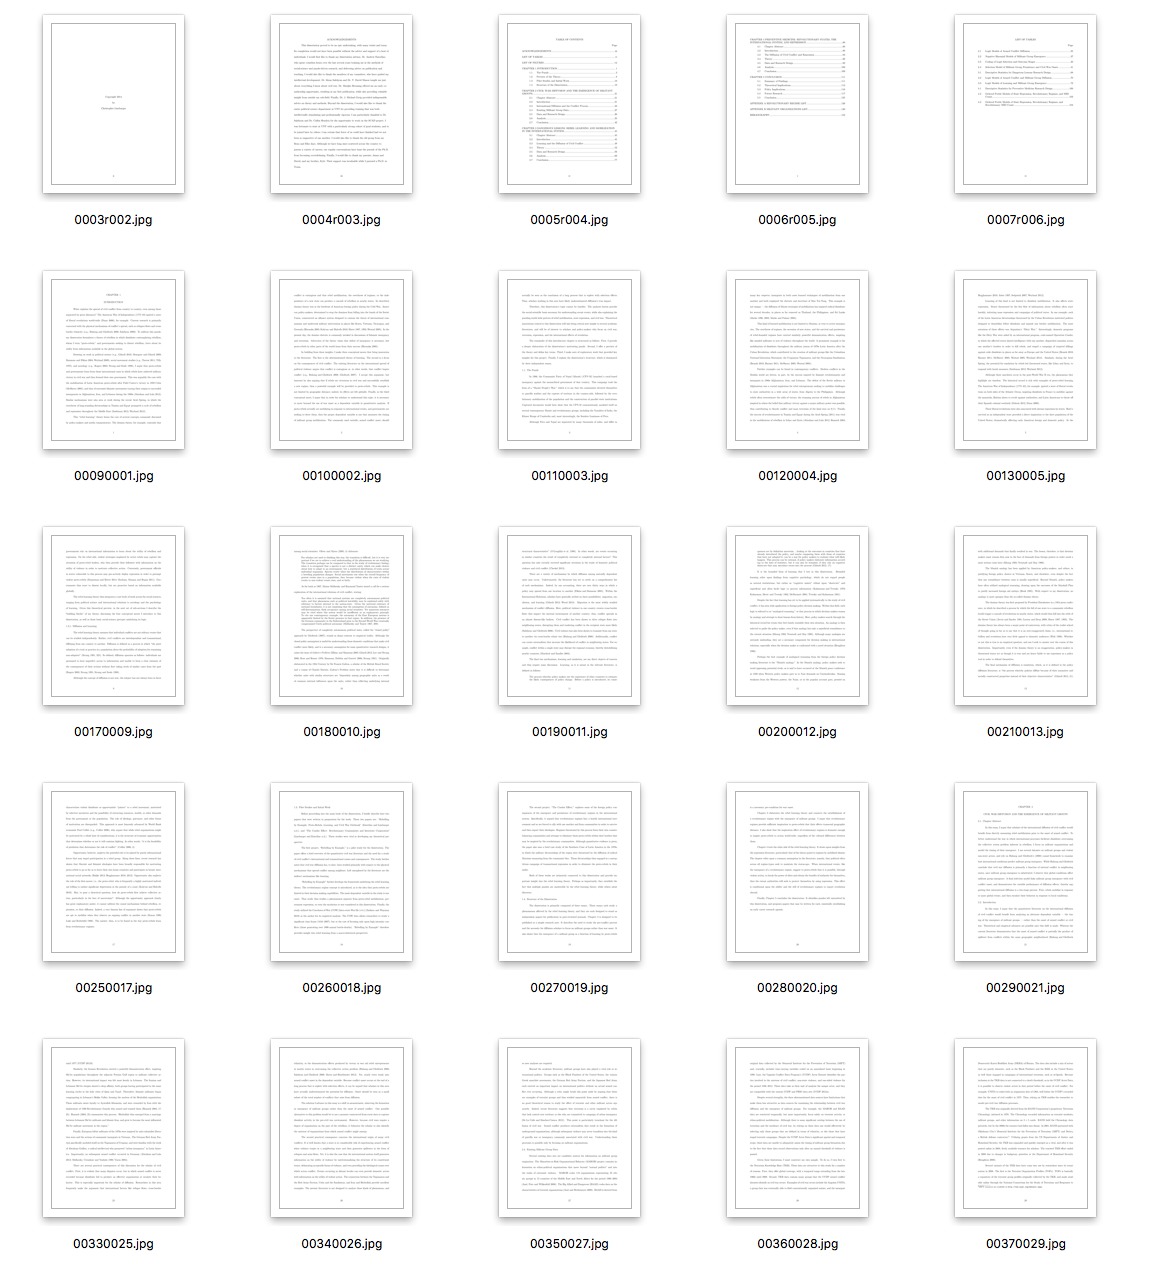
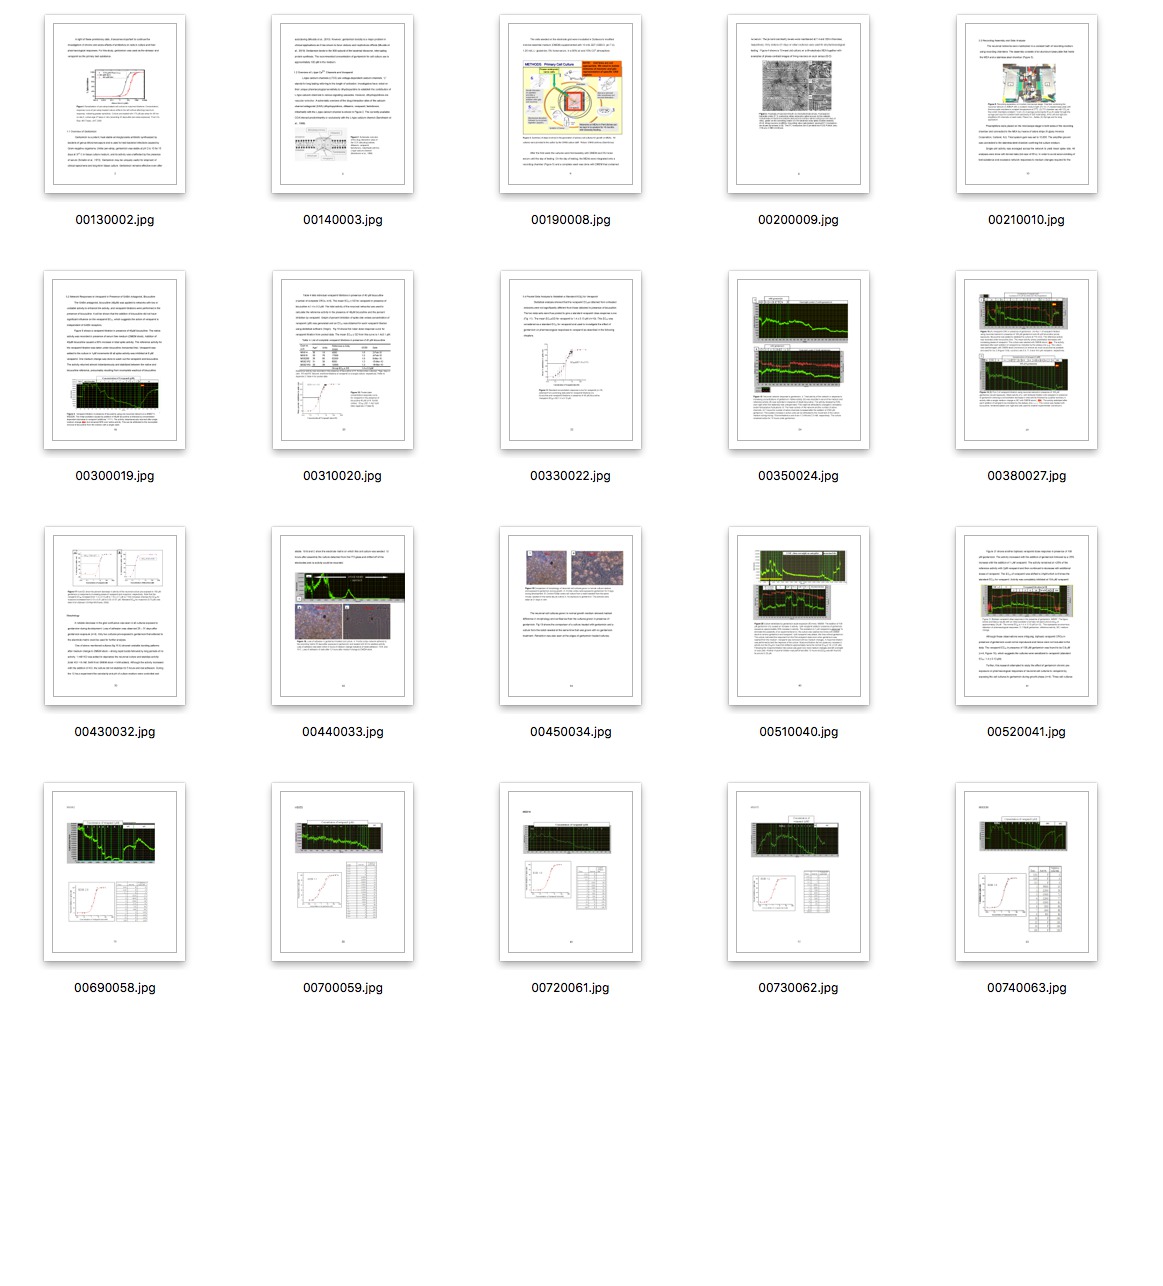
Example Two

Thumbnails for ark:/67531/metadc699999/ including interesting and less visually interesting pages.
Thumbnails for ark:/67531/metadc699999/ with just visually interesting pages shown.
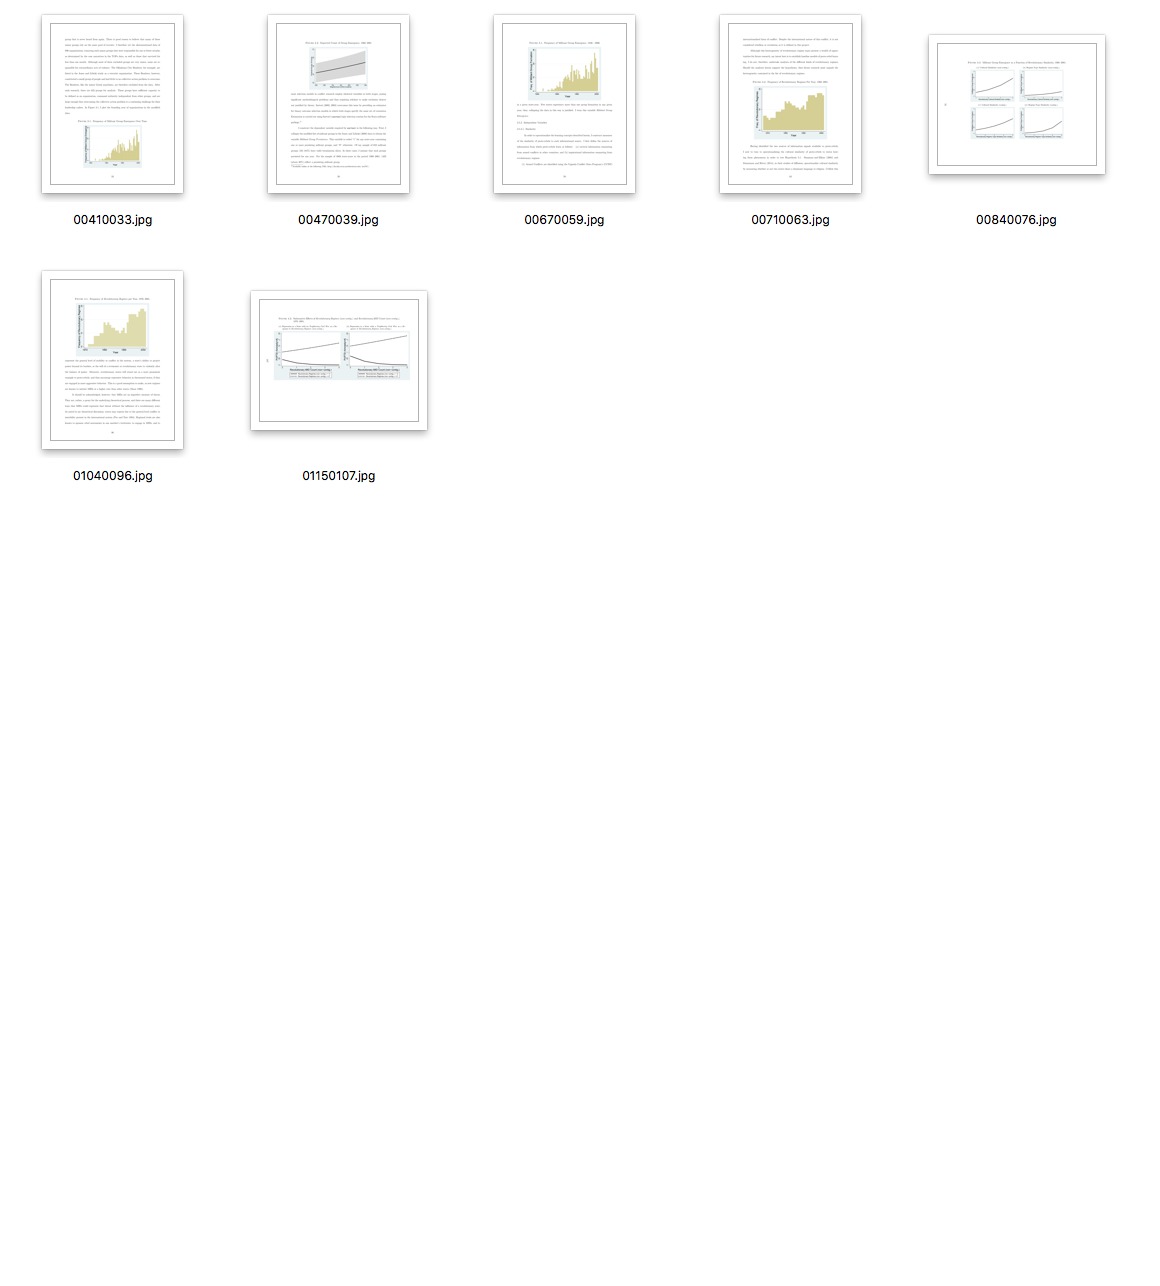
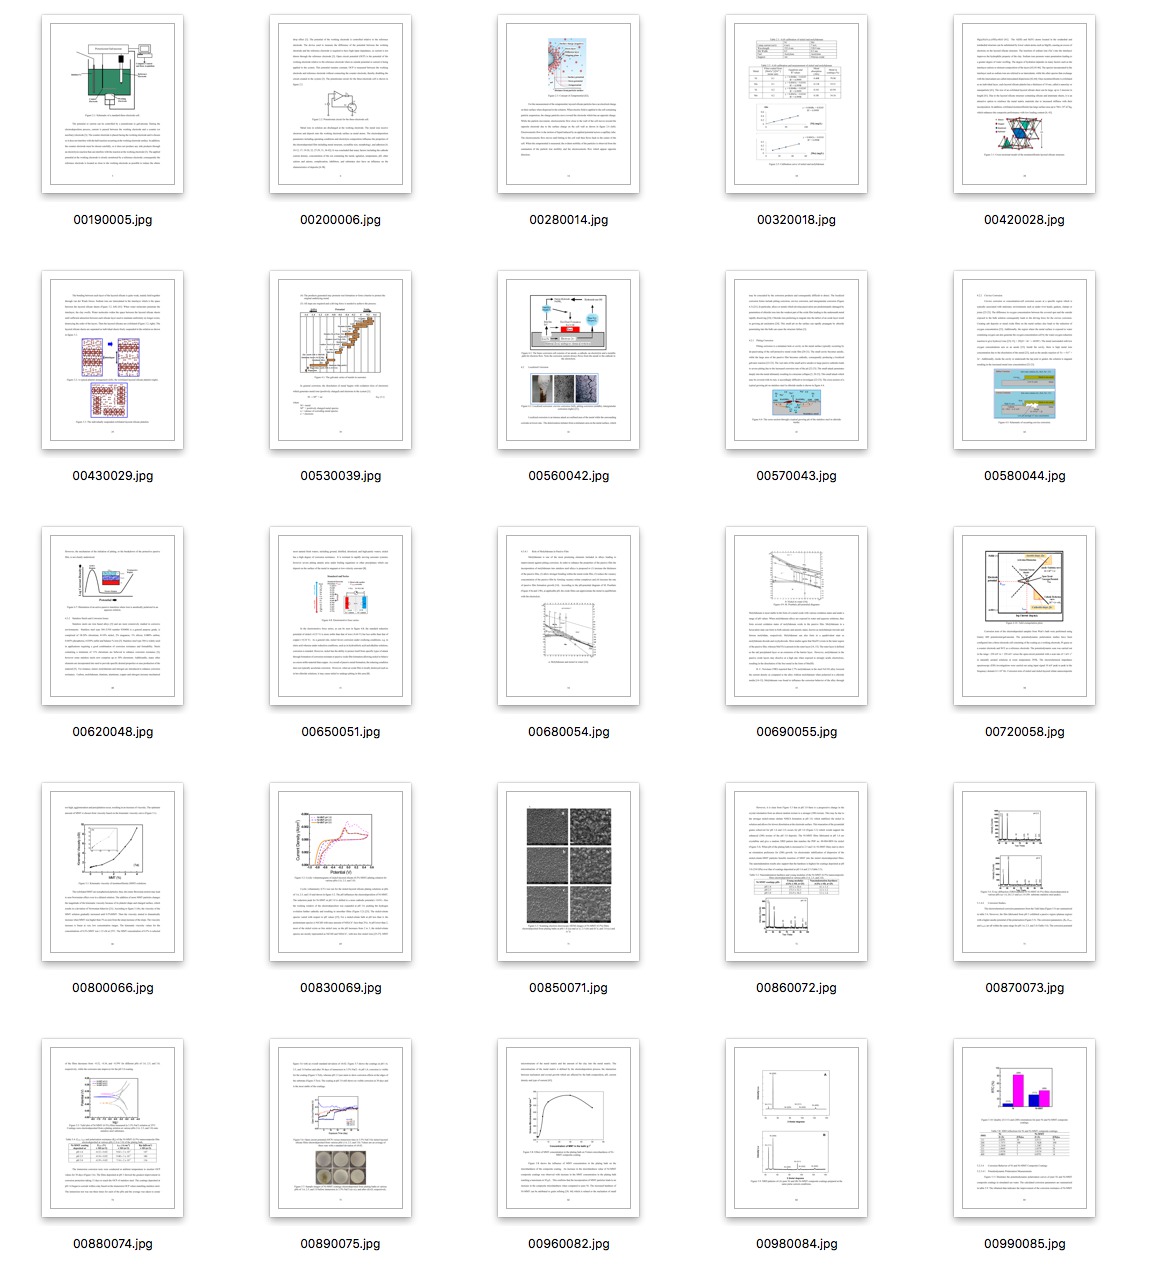
Example Three
Thumbnails for ark:/67531/metadc699991/ including interesting and less visually interesting pages.
Thumbnails for ark:/67531/metadc699991/ with just visually interesting pages.
So in the end I was able to implement the code in Python with Pillow and a fancy little lambda function. The speed was much improved as well. For those same images that were taking up to 23 seconds to process with the ImageMagick version of the workflow, I was able to process them in a tiny bit over a second with this Python version.
The full script I was using for these tests is below. You will need to download and install Pillow in order to get it to work.
I would love to hear other ideas or methods to do this kind of work, if you have thoughts, suggestions, or if I missed something in my thoughts, please let me know via Twitter.